The name says it all. Tired of looking at your package.json only to realize none of the numbers mean anything?
Make them mean something with SyncYarnLock.
The command I prefer is npx syncyarnlock -k to preserve prefixes such as ^.
The name says it all. Tired of looking at your package.json only to realize none of the numbers mean anything?
Make them mean something with SyncYarnLock.
The command I prefer is npx syncyarnlock -k to preserve prefixes such as ^.
Don’t want your time machine backup to take 8 hours? Install this:
https://github.com/stevegrunwell/asimov
Install with brew, and it will automatically configure Time Machine to exclude common dependency directories (such as node_modules).
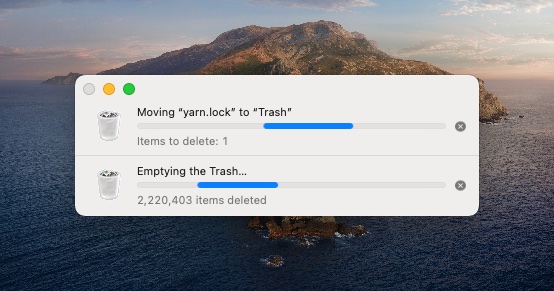
Unless you like waiting an hour for 2.5 million files to delete using OSX, use npx npkill.
To avoid conflicts between the two, you need to install a binding plugin.
https://khalilstemmler.com/blogs/tooling/prettier/
They don’t work.
Sorry.
If you try to do @if statements with comparisons, say < or >, you’ll get an error. If you try any math functions, error. Module ‘math’ won’t be found, or you’ll end up with an undefined operation.
The upside is that you haven’t done anything wrong, and they will work elsewhere. If I find a solution, I’ll update this post.
Say you are working for multiple clients and each requires a separate GitHub account, plus your personal account. You can automate logging into all of them.
Step 1: Create your first SSH key.
https://docs.github.com/en/github/authenticating-to-github/connecting-to-github-with-ssh/generating-a-new-ssh-key-and-adding-it-to-the-ssh-agent
In GitHub’s instructions, they recommend:
$ ssh-keygen -t ed25519 -C "your_email@example.com"I slightly modified this to look like:
$ ssh-keygen -f dmrobbins03 -C "mygithubaccountemail@gmail.com"-f is the encoding type, dmrobbins03 is the file name prefix (it will generate dmrobbins03_id_rsa).
One tutorial (https://www.youtube.com/watch?v=N2hMGEeYR7c) recommended -f for their keygen, and that looked more familiar to me than the -t output. I am confident that either one works; I was just frustrated at the time.
For me, my config file looked like this:
# Default - dmrobbins03
Host github.com
   HostName github.com
   IdentityFile ~/.ssh/dmrobbins03_id_rsa
You do NOT want to put your default GitHub SSH key under Host * – it will override everything!
I found this counter-intuitive since I assumed increased specificity would have priority. I guess not.
Be sure to follow all of the instructions on the first GitHub link. You’ll need to copy-paste your SSH keys to each of your accounts under Settings > SSH & GPG Keys.
Step 2: Create your second SSH key.
Follow the same instructions as above.
$ ssh-keygen -f clientdavid -C "myclientgithub@gmail.com"My config then became:
# Default - dmrobbins03
Host github.com
   HostName github.com
   IdentityFile ~/.ssh/dmrobbins03_id_rsa

# Client Account
Host github.com-clientdavid
  HostName github.com
  IdentityFile ~/.ssh/clientdavid_id_rsa
Step 3: Verify
In terminal, use the following commands to verify your SSH is working with GitHub.
ssh -T git@github.comIf you’re successful, you’ll see this:
Hi dmrobbins03! You’ve successfully authenticated, but GitHub does not provide shell access.
Now try your alternate account.
ssh -T git@github.com-clientdavidYou should see this:
Hi client-david! You’ve successfully authenticated, but GitHub does not provide shell access.
THE IMPORTANT PART IS YOUR USERNAME.
I wasted more minutes than I should have because I did not notice that both verifications were using my default account. This was because I had set originally up my host to be *.
Now how do you use this damn thing?
Step 4: Using the damn thing.
When you clone a GitHub repository with SSH, your command will look something like this:
git clone git@github.com:someonesaccount/my-repository.gitThat uses your default account. In order to use your secondary (tertiary, etc) accounts, your command will need to be modified as follows:
git clone git@github.com-clientdavid:someonesaccount/my-repository.gitJust change github.com to github.com-clientdavid and that’s it. You’ll have the correct authentication from this point forward.
Additional references:
There are a few important things to keep in mind.
Adding @font-face to an SVG in JSX (React) will look like this:
<defs>
    <style type='text/css'>
      { `@font-face {
          font-family: SharpSansNo2;
          font-weight: 900;
          font-style: normal;
          src: url(data:application/font-woff;charset=utf-8;base64,${SharpSansDisplayNo2});
      }` }
    </style>
  </defs>
</svg>
Here is my JS for converting my SVG to a Blob. Notice that I clone the element before making modifications, such as converting CSS styles to SVG attributes.
const $clonedSvgElement = $svgElement.cloneNode(true) as SVGElement;

// make any tweaks to colors (such as replacing css variables with calculated values)
const $background = $svgElement.querySelector('[data-background]') as SVGGraphicsElement;
const $clonedBackground = $clonedSvgElement.querySelector('[data-background]') as SVGGraphicsElement;
$clonedBackground.setAttribute('fill', getComputedStyle($background).fill);

const $textElements = $svgElement.querySelectorAll('text');
const $clonedTextElements = $clonedSvgElement.querySelectorAll('text');
for (let i = 0; i < $clonedTextElements.length; i++) {
const $textElement = $textElements[i];
const $clonedTextElement = $clonedTextElements[i];
const computedStyles = getComputedStyle($textElement);
const attributes = {
  color: computedStyles.color,
  fill: computedStyles.color,
  'font-family': 'SharpSansNo2',
  'font-size': computedStyles.fontSize,
  'font-weight': computedStyles.fontWeight,
  'letter-spacing': computedStyles.letterSpacing
};
for (const key in attributes) {
  const value = key ? attributes[key] : '';
  if (value) {
    $clonedTextElement.setAttribute(key, value);
  }
}
}

// export current state to HTML
const data = new XMLSerializer().serializeToString($clonedSvgElement);

// generate blob with base64 data of image
const blob = new Blob([data], { type: 'image/svg+xml;charset=utf-8' });
const URL = window.URL || window.webkitURL || window;
const blobURL = URL.createObjectURL(blob);

// generate image with canvas data (to convert to PNG and other formats)
const image = new Image();
document.body.appendChild(image);
const canvas = document.createElement('canvas');
canvas.width = this.currentPoster.width * scale;
canvas.height = this.currentPoster.height * scale;
const context = canvas.getContext('2d');
let png: string;

// wait for image to load
image.onload = () => {
if (context) {
  context.drawImage(image, 0, 0, this.currentPoster.width * scale, this.currentPoster.height * scale);
  png = canvas.toDataURL();

  // trigger download
  const download = function (href, name) {
    const link = document.createElement('a');
    link.download = name;
    link.style.opacity = '0';
    document.body.append(link);
    link.href = href;
    link.click();
    link.remove();
  };
  download(png, 'sddw-poster.png');
}
};
image.src = blobURL;<Link href="/home"> all need to start with a /. If they do not, there will be a local/server synchronization error.{poop.map(({ id }) => ( <>Poop { id }</> );{poop.map(({ id }) => { return <>Poop { id }</>; };ssh your-account@deploy.us1.frbit.cocd ~/.sshvi authorized_keys: and wq to write and quit.deploy.us1.frbit.com FortRabbit url found in SFTP tab as a known host. The fingerprint should be generated automatically.bitbucket-pipelines.yml file in your project root. The code below is a good starting template.
image: php:7.0.0
 pipelines:
 branches:
     your-project-name:
       - step:
           deployment: staging
           script:
           - apt-get update && apt-get install -y unzip git ssh
           - git remote add fortrabbit your-project-name@deploy.us1.frbit.com:your-project-name.git
           - git push fortrabbit your-project-name -f